
Last updated November 18, 2026
DIY vs Professional Blown In Insulation: What’s Safe to Do Yourself
Home improvement stores will hand you a blower free when you buy enough bags of insulation. The rental counter won’t tell you that without sealing the air bypasses first, you’ll be insulating a colander. You’ll fill the attic, feel good about it, and still watch your winter bills barely move. In Enterprise, we’ve seen this play out more than once, especially in older tract homes where the ceiling was never sealed properly to begin with. This guide draws a clear line: the parts of blown-in insulation a careful homeowner can safely handle, the parts that create real liability and health risk, and the honest cost comparison so you know whether DIY actually saves what you think it does. We’ll also show you what “professional” should mean, and how to verify it before anyone steps through your door.
Quick Answer
Topping up an existing, problem-free attic by 2 to 3 inches is genuinely DIY-safe if the space has no HVAC penetrations, no moisture issues, and clear access. The work that matters most – air sealing around wiring, plumbing, ducts, and recessed lights before any insulation goes down – is not a safe DIY task. That prep work is what separates insulation that performs from insulation that just looks done, and it’s exactly where professionals earn the price difference.
Table of Contents
- What’s Actually Safe to Do Yourself
- Why the Prep Work Matters More Than the Insulation
- What DIY Really Costs vs a Professional Quote
- Three Scenarios Where DIY Makes Things Worse
- What “Professional” Should Mean (and How to Verify It)
- Step-by-Step: The Professional Installation Sequence
- Common Mistakes to Avoid
- When to Call a Professional
What’s Actually Safe to Do Yourself
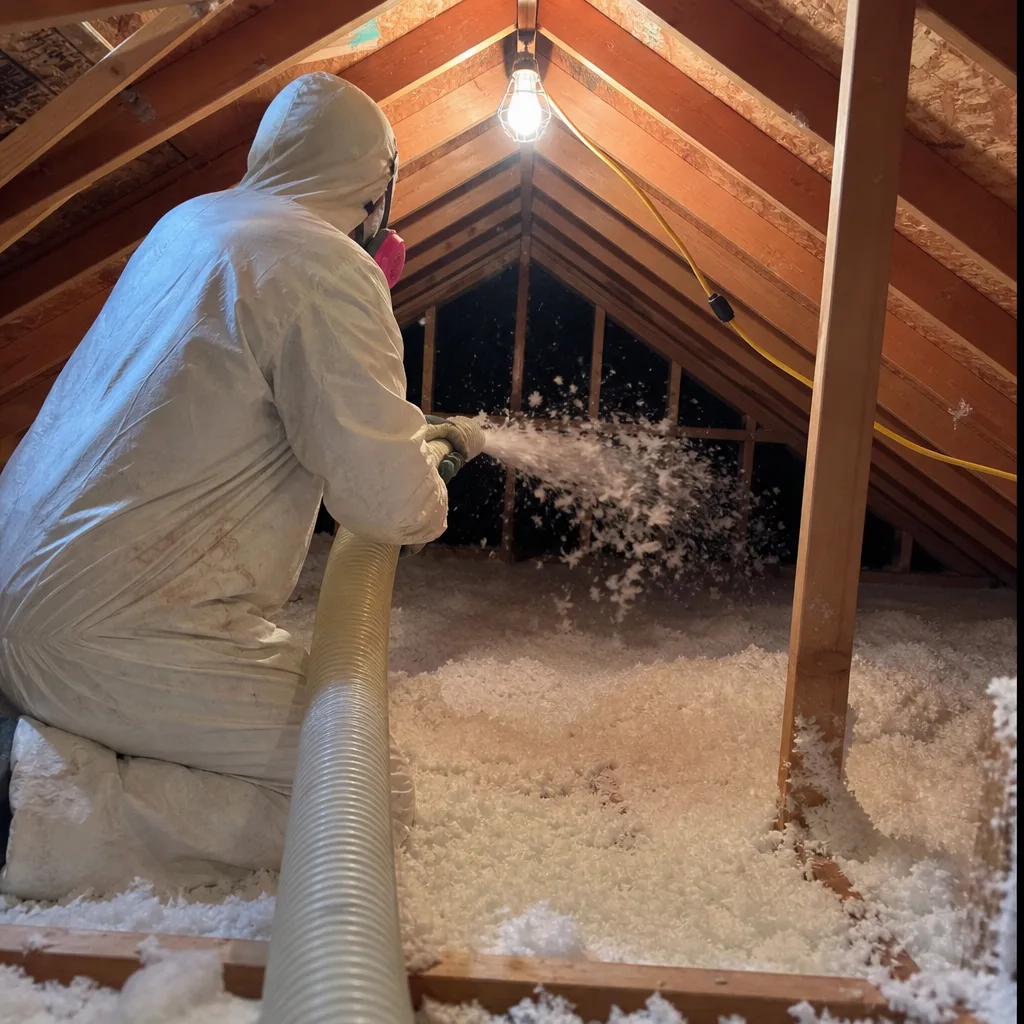
Blown-in insulation (loose fibers blown into the attic cavity to fill every gap) is one of the few trade tasks a homeowner can reasonably attempt. But “reasonably” has tight boundaries. If every one of the following is true, you’re in the safe zone:
- You’re topping up an existing installation, not starting from bare ceiling.
- You only need to add 2 to 3 inches to reach a reasonable R-value.
- The attic is accessible through a full-size hatch with safe footing.
- There are no HVAC ducts, plumbing stacks, or wiring runs cutting through the ceiling plane.
- There’s no sign of moisture, staining, mold, or past water intrusion.
- The existing insulation is a known modern product, not vermiculite or disturbed fiberglass.
If all six boxes are checked, a homeowner with an N95 respirator, eye protection, gloves, and a rented blower can add a couple inches of unfaced fiberglass on a cool morning and get a modest improvement. In Enterprise, that means working before the attic hits 130°F, which happens fast in June. You’ll want to start early and keep the day short. That scenario is the 20% of the job the rental machine actually handles. Everything before that first bag is opened is where DIY falls apart, and it’s the 80% the rental agreement never mentions.
Why the Prep Work Matters More Than the Insulation
Insulation slows heat. Air sealing stops it. A well-insulated attic with unsealed bypasses still loses a surprising amount of conditioned air, because the same gaps that let warm air escape in winter pull hot air in during summer. The insulation sits on top like a blanket over an open window. That’s why the prep sequence matters more than the bag count:
- Identify every bypass: wire penetrations, plumbing stacks, the chimney chase, top plates, recessed can lights, and duct boots.
- Seal bypasses with the correct material for each – fire-rated sealant at penetrations, appropriate covers or boxes at recessed fixtures.
- Install baffles at every eave to keep the ventilation path clear.
- Verify R-value targets and calculate bag count for the actual square footage.
- Blow insulation evenly, checking depth at multiple points.
- Document what was done, with photos, for future reference.
Steps one through three are the ones that create liability for a homeowner. Wiring penetrations and recessed light housings aren’t places to guess. Improperly covered recessed lights can build up heat and become a fire risk. Bypasses left open mean the new insulation works against open gaps. In our experience across Enterprise, the difference between a middling result and a real one almost always comes down to how carefully those bypasses were sealed before the first bag went in.
What DIY Really Costs vs a Professional Quote
Sandbagging the DIY cost comparison doesn’t help anybody. Here’s an honest line-item breakdown for a roughly 1,000-square-foot attic top-up, using realistic materials:
| Line Item | DIY Cost Range | Professional Cost Range |
|---|---|---|
| Blown-in fiberglass material (10 to 15 bags) | $300 – $500 | Included in quote |
| Blower rental (often free with bag purchase) | $0 – $80 | Included in quote |
| Respirator, goggles, gloves, knee pads | $60 – $120 | Included in quote |
| Air sealing materials and baffles | $80 – $200 | Included in quote |
| Rented truck or disposal fees | $40 – $120 | Included in quote |
| Labor (own, or hired install crew) | 0 (your weekend) | $600 – $1,200 |
| Realistic total | $480 – $1,020 plus your time | $1,200 – $2,400 for a proper install |
The gap looks like $500 to $1,400. But that gap covers the air sealing, the bypass identification, the baffle work, and the coverage that should exist if something goes wrong. A proper installation should also come with a written R-value target and a written guarantee. For a homeowner who values the weekend and the peace of working in extreme attic heat, that’s usually an easy call. In Enterprise, we’ve noticed that the DIY savings claim tends to shrink significantly when you add up the protective gear, the rental truck, and the pre-work materials the rental agreement doesn’t mention.
If you want to compare real numbers, our team at Blown In Insulation in Enterprise delivers a written price before any work starts. That’s a floor to compare against.
Three Scenarios Where DIY Makes Things Worse
Three specific scenarios cause problems. Each one is common enough that we’ve seen all three in Enterprise within the last year.
1. Existing mold gets buried
Blowing insulation over a ceiling stain doesn’t fix the moisture problem. It hides it, and the mold keeps growing in the dark. If you suspect any past water intrusion, get that inspected before a single bag goes in. Foam Board and faced products can trap moisture against the deck if the source isn’t addressed, and then you’re looking at a much bigger repair.
2. Vermiculite or old fiberglass gets disturbed
Homes built before the 1990s occasionally hide vermiculite, which can contain asbestos. Disturbing it without testing is a genuine health risk. Old fiberglass that gets stirred up can also release fine dust that makes the attic a hazard to work in. Any older home should get tested before anyone opens a bag. If a professional points this out, take it seriously.
3. Recessed lights become fire risks
Older recessed can lights weren’t designed for insulation contact. Covering them without a proper cover or an IC-rated housing traps heat, and that traps heat at the wrong end of the fixture. This is one of the most common things we correct in Enterprise. A professional checks every recessed fixture before insulating, without exception.
What “Professional” Should Mean (and How to Verify It)
“Professional” is a word on every truck in every driveway. Here’s what to actually verify, in order, before you let someone into your attic:
- Licensed and insured. Ask for the license number and certificate of insurance. A real professional hands these over without hesitation.
- Named technician, sent in advance. A serious company confirms who’s coming and when, before the visit. At Aspen Attic Insulation Enterprise, every technician is background-checked, identity-verified, and photo-badged – and their name and photo are sent to the homeowner before the visit. If someone else shows up, the visit is free.
- Written price before work starts. Not a verbal range. A written price, in hand, before the first bag is opened.
- Written R-value target. A specific number for your attic, based on your zone and existing depth.
- Written guarantee. Ask what’s covered, how long, and what happens if something fails. Our 365-Day Done Right Promise covers labor and materials in writing – and if a repair fails, we come back for free.
- Material brands matched to the specific need. Knauf, Rockwool, CertainTeed, and Icynene exist for different scenarios. A serious installer picks the product for the problem, not the one that’s available.
This is part of Aspen Attic Insulation Enterprise home standard, and it should be the floor for anyone you hire. No exceptions.
Step-by-Step: The Professional Installation Sequence
Here’s what a proper installation looks like from the inside, so you can compare it to whatever a contractor proposes:
- Inspection. A trained tech inspects the attic for moisture, pest activity, existing insulation condition, and every bypass.
- Air sealing. Every wiring penetration, plumbing stack, top plate, and recessed fixture gets sealed with appropriate materials.
- Baffle installation. Ventilation baffles go at every eave so the roof can breathe.
- Attic prep. Any damaged or displaced insulation gets removed or rearranged. Any needed lighting covers or duct sealing happens at this step.
- R-value calculation. Depth targets confirmed against the insulation being installed.
- Blowing. Insulation is blown evenly, with depth checked against the target at multiple points across the attic.
- Final walkthrough. The tech walks the attic, verifies the target, and documents with photos. You get the written record.
For spray-applied applications where a specific attic shape or duct setup can’t be reached with blown-in, Spray Foam Insulation in Enterprise solves a different problem: it fills gaps and closes the envelope in places blown-in can’t reach. The right answer isn’t always one product. It’s the one that fits the attic in front of you. Generally, standard attic work comes back to Attic Insulation in Enterprise as the foundation service, and blown-in is the format applied on top of that prep work.
Common Mistakes to Avoid
- Skipping air sealing entirely. Insulation over unsealed bypasses is a waste of every bag. Most DIY top-ups skip this step, and most of them underperform as a result.
- Covering recessed lights without checking the housing rating. In Enterprise, we’ve corrected this in older tract homes more times than we can count. A fixture that wasn’t designed for insulation contact becomes a heat trap when it’s covered.
- Blowing over the eave vents. If the baffles aren’t in place, insulation blocks the ridge-to-eave ventilation path and traps moisture in the roof deck.
- Not measuring depth at multiple points. A single depth check in the center of the attic doesn’t confirm coverage. Depth needs to be checked across the full footprint.
- Insulating in peak summer without protection. Enterprise attic temperatures can reach well above 130°F by mid-morning. Respiratory and heat protection aren’t optional.
- Assuming the rental blower does the whole job. The blower handles the blow. It doesn’t seal, baffle, inspect, or cover fixtures. Those are the parts that actually determine whether the install works.
- Hiring without verifying insurance and a written guarantee. A handshake quote is not a written price. Coverage in writing is what you’re actually paying for.
When to Call a Professional
Call a professional if any of the following is true: your attic has any sign of moisture, mold, or past water intrusion; you have vermiculite or old fiberglass in place; you have unrated recessed lights; you have any HVAC penetrations, duct boots, or complex wiring in the ceiling plane; you’re starting from bare ceiling; or you simply don’t want to spend a Saturday in a 130°F attic. Those are not edge cases – they’re most attics. In Enterprise, our team at Aspen Attic Insulation Enterprise offers free estimates, provides written pricing before any work starts, and sends every technician by name and photo ahead of the visit. Call (844) 761-9996 for a free estimate. If a technician’s name and photo aren’t the ones on your confirmation, the visit is free. That’s the standard. It’s also the fastest way to know whether the price you’re quoted is the price you’ll pay.
Frequently Asked Questions
Yes for a narrow case: topping up an existing, problem-free attic by 2 to 3 inches when there’s no moisture issue, no complex penetrations, and clear access. The blower handles the blowing. It doesn’t air seal, baffle, or inspect, and those steps determine whether the job performs. If any of those steps are missing from your plan, DIY won’t deliver the result you’re expecting.
Most residential blown-in attic installations in Enterprise land in the $1,200 to $2,400 range for a typical single-story attic, depending on square footage, existing insulation condition, and the prep work required. Complex attics and homes with significant air sealing needs run higher. Call (844) 761-9996 for a written quote – estimates are free and no work starts until you have the price in writing.
For most attics, top-up is cheaper than removal and replacement. You only remove insulation when it’s damaged, contaminated, or contains vermiculite. Otherwise the existing material stays in place and new material is added on top after the prep work is done. An inspection confirms which scenario you’re in.
Most Enterprise attics target R-38 to R-49 for good performance in our climate. Your specific number depends on the existing depth and the home’s construction. A written R-value target should appear in your estimate before work begins.
With Aspen Attic Insulation Enterprise, the 365-Day Done Right Promise covers labor and materials in writing for a full year. If a repair fails, we come back for free. That’s the standard every job carries.
Aspen Attic Insulation Enterprise sends the technician’s name and photo to the homeowner before the visit. Every technician is background-checked, identity-verified, and photo-badged. If anyone other than the named technician arrives, the visit is free and we make it right.
The Bottom Line
Blown-in insulation is one of the few home upgrades where DIY sometimes makes sense – but only for a top-up of an already-clean, already-sealed attic. The 80% of the job that determines whether the insulation performs (air sealing, baffling, bypass identification, fixture safety) is not safe DIY work, and it’s not what the rental blower was designed for. If your attic has any moisture, older materials, or penetrations, the professional install pays for itself in performance and in what’s on the line if something goes wrong. Verify the license, the insurance, the named technician, the written price, the R-value target, and the written guarantee – before anyone enters your home. Call (844) 761-9996 for a free estimate in Enterprise.
Written by the team at Aspen Attic Insulation Enterprise.