
Last updated November 18, 2026
DIY vs Professional Spray Foam Insulation: What’s Safe to Do Yourself
Two-component spray foam kits sit on the shelf at any hardware store, and they do one job very well: sealing the gap where a pipe comes through a wall. That’s a real job, and a can of expanding foam handle it. But that same product is not what a professional applies to an attic, and treating the two as interchangeable is how attics get ruined. The chemistry is different, the control is different, and the outcome is different. This guide walks through exactly where the line falls, what goes wrong when it’s crossed, and the four questions that separate a qualified spray foam contractor from a low-bid operator. We’re writing this from Enterprise, where we’ve seen what a bad foam job looks like six months after the fact.
Quick Answer
Consumer foam kits are appropriate for one narrow use: targeted air sealing around pipes, wiring penetrations, and small gaps at the rim joist. Whole-attic spray foam application has no legitimate DIY version, not because the chemicals are restricted, but because the variables that determine whether the foam cures and performs (ratio, temperature, humidity, and thickness) cannot be controlled with consumer-grade equipment. For any attic-wide job in Enterprise, hire a professional applicator and verify their equipment calibration and temperature monitoring before work starts.
Table of Contents
- Consumer Kits vs Professional Proportioner Rigs
- What Happens Chemically When Foam Is Applied Wrong
- The One Appropriate Use for Consumer Foam Kits
- Health and Safety Realities of Two-Component Foam
- How to Evaluate a Spray Foam Contractor
- Why Enterprise’s Climate Makes the Stakes Higher
- Common Mistakes to Avoid
- Frequently Asked Questions
Consumer Kits vs Professional Proportioner Rigs
The single biggest difference between a $40 foam kit and the rig a professional brings to your attic is not the brand on the label. It’s ratio control. Professional spray foam is a two-component thermoset: an A-side isocyanate and a B-side polyol resin. When the two components meet at the right ratio, at the right temperature, under the right pressure, they react exothermically and cure into a rigid cellular plastic. When they don’t, you get a sticky, gummy, uncured mess that can off-gas for weeks.
Consumer cans use a pre-pressurized propellant system. The ratio is set by the manufacturer and locked in at the factory. You cannot adjust it, and you can’t verify it either. A professional proportioner rig does the opposite: it puts ratio in the applicator’s hands. That’s the point. The rig lets a trained technician dial the ratio for the conditions on that specific day, because the foam’s behavior changes with temperature, humidity, and substrate.
- Consumer kits: pre-set ratio, limited temperature window, small coverage per can, no thickness verification.
- Professional rigs: adjustable ratio, heated hose lines, calibrated pressure gauges, predictable cure times, verified thickness on the substrate.
That’s why pros get different results. Not because they pay less for the product, but because they can control the variables the product depends on. In our experience with spray foam insulation in Enterprise, the difference between a good job and a failing one often comes down to whether the applicator adjusted the ratio for the day’s humidity.
What Happens Chemically When Foam Is Applied Wrong
Spray foam’s chemistry is not forgiving. Applied at the wrong temperature, or with the wrong ratio, or when the substrate is wet, the reaction goes sideways. The foam can fail to rise fully, cure into a brittle shell, form voids inside the cell structure, or stay soft and gummy at the core. Each of those failure modes has a visible signature, and each of them is hard to spot if you don’t know what to look for.
Here are the visible signs of a bad batch:
- Discoloration: off-color foam, especially dark or mottled patches, often means foam was sprayed onto a wet substrate or the ambient temperature was outside the manufacturer’s window.
- Sticky or tacky surface: cured foam should feel firm and dry. A tacky surface 24 hours after application is a red flag for an off-ratio mix.
- Shrinkage or pull-away: foam that’s separated from the substrate or shrunk away from framing usually points to a mixture that didn’t fully crosslink.
- Visible voids or air pockets: voids create thermal bridges that defeat the whole purpose of the application.
- Brittle or crumbling texture: cured foam should be firm but not crumbly. Crumbling suggests too much A-side or too little B-side.
The frustrating part is that a lot of these symptoms don’t show up immediately. A bad batch can look fine on day one and fail by the third month. It can look solid on the surface and be hollow inside. That delay is why pinch-testing the foam a week later, and again a month later, matters so much. It’s also why the 365-Day Done Right Promise we back every job with exists: if the foam fails, we come back. Call (844) 761-9996 and we’ll talk through what a proper remediation looks like.
The One Appropriate Use for Consumer Foam Kits
We want to be specific here, because “don’t DIY spray foam” is too broad. There is a real, legitimate, and even encouraged use of consumer foam kits: targeted air sealing.
Here’s what that means in practice. Look around the perimeter of the attic floor, the attic hatch, any plumbing penetrations, any electrical penetrations, and the top plate of walls. Where the gap is small, where the foam is filling a hole rather than creating an insulating surface, and where a single can can do the job in one application, consumer kit foam is appropriate. Stick with a low-expansion formula for windows and doors, and a standard expanding foam for larger voids around plumbing.
- Choose the right formula. Low-expansion foam for window and door frames; standard-orange for larger gaps around pipes and wiring.
- Clean and dry the gap. Foam won’t bond to dust, oil, or moisture. Wipe the area and let it dry fully before spraying.
- Dampen the substrate lightly, don’t saturate it. A fine mist helps adhesion for most polyurethane foams. A soaking wet substrate causes the foam to fail.
- Fill the gap in layers if it’s deeper than about 2 inches. That lets each layer fully expand before the next goes in.
- Trim the excess once it’s fully cured. Give it at least 4 hours, and check the can for the manufacturer’s cure time before you trim.
Notice that none of those steps describes “cover the attic floor” or “encapsulate the roofline.” That’s the line. Consumer kits don’t have the coverage, the thickness control, or the cure reliability for attic-wide application, and neither do they need to. The rest of the insulation work is where professionals earn their keep. For the attic-floor, blown-in style coverage, see our guide to blown in insulation in Enterprise.
Health and Safety Realities of Two-Component Foam
The safety guidance you’ll find on most foam cans is “ventilate the space.” That undersells the risk. The A-side of two-component foam is an isocyanate, most commonly MDI (methylene diphenyl diisocyanate). During application and curing, MDI volatilizes and can be inhaled. For most people, a brief exposure to a small amount causes irritation. For some people, isocyanate exposure can trigger sensitization, meaning they may react to even tiny amounts afterward, permanently. That’s not a “ventilate the space” risk. That’s a serious respiratory risk.
Here’s what proper PPE looks like for a two-component application, consumer kit or not:
- Respiratory protection: at minimum a half-face respirator with organic vapor and particulate cartridges. A dust mask is not sufficient.
- Skin protection: nitrile gloves, forearm coverage, and eye protection. Isocyanates absorb through skin and cause contact dermatitis.
- Eye protection: sealed goggles, not safety glasses, because foam is under pressure and happens to fly.
- Ventilation: open the space and run a fan exhausting to the outdoors. Do not run the HVAC system.
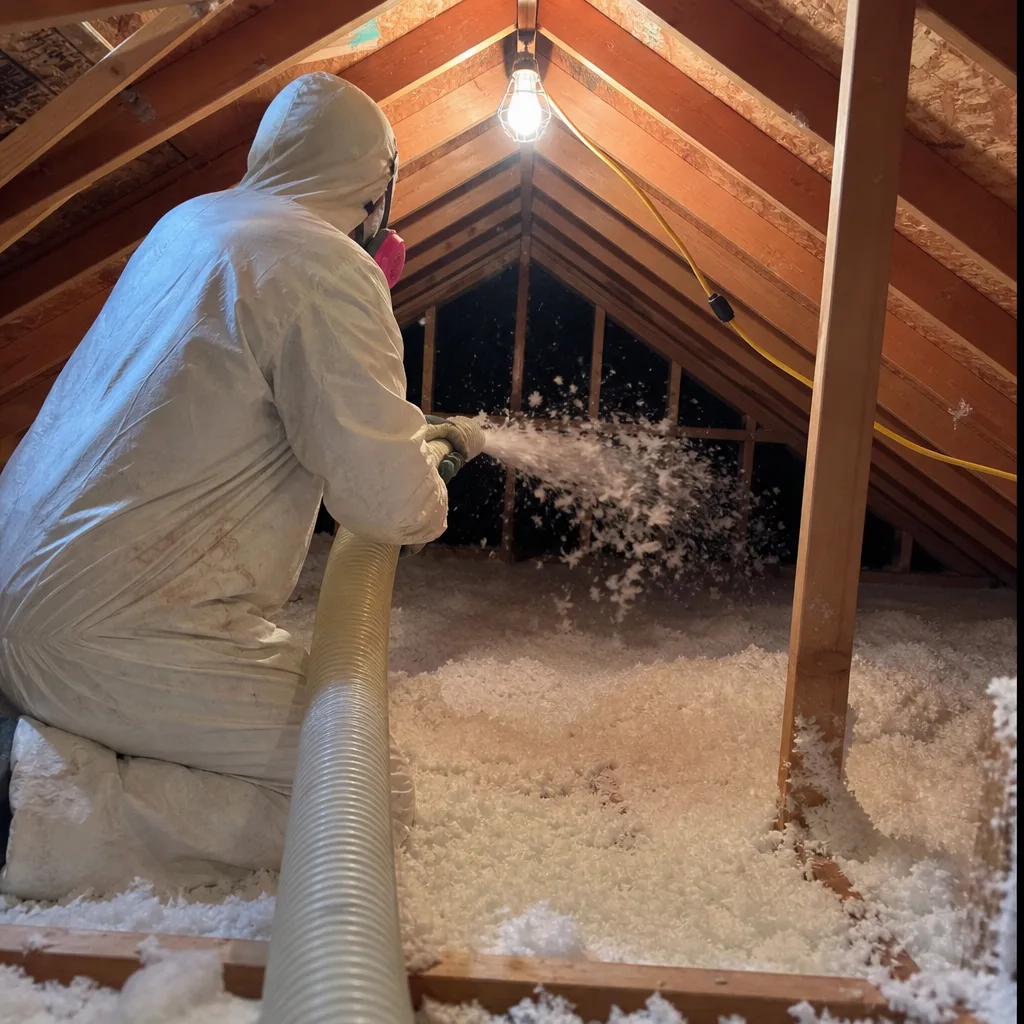
For a professional spray foam application in an attic, the applicator uses a fresh-air supplied respirator, full body coverage, and air monitoring. It’s not a small upgrade, and it’s not a luxury. It’s the reason a trained applicator can responsibly do a job a homeowner shouldn’t do themselves. If you suspect moisture problems in an Enterprise attic, or you’re dealing with an old spray job that’s failing, call us at (844) 761-9996 before you touch anything.
How to Evaluate a Spray Foam Contractor
Once you’ve ruled out DIY, the next question is how to make sure the professional you hire knows what they’re doing. Spray foam contractors are not all the same, and the low-bid operator is often low-bid because something in the process is being skipped. Here are the four questions we’d ask any spray foam contractor, including us:
- “How do you check your equipment calibration, and how often?” A qualified applicator can tell you about their proportioner’s daily calibration routine and the specific gauges they watch. A vague answer is a red flag.
- “How do you monitor temperature on the day of application?” Foam behaves differently at 50°F than at 90°F. Ask what the working temperature window is, and what they do if the attic is outside it.
- “How do you verify foam thickness once it’s applied?” The right answer involves a depth gauge or a measured sample, not a visual estimate. Thickness is the difference between the R-value you’re paying for and a fraction of it.
- “What’s your policy if the foam fails to cure?” The honest answer is a call-back commitment. Ours is the 365-Day Done Right Promise, in writing, covering labor and materials for a full year.
At Aspen Attic Insulation Enterprise, we also send you the technician’s name and photo before the visit, so you know exactly who’s coming. Every tech is background-checked, identity-verified, and arrives in a clean marked uniform with a photo ID badge. If anyone other than the person in the photo shows up, the visit is free and we make it right. That’s part of what we call the Threshold Standard, and it’s how we handle every job. For a broader look at the work, see attic insulation in Enterprise.
Why Enterprise’s Climate Makes the Stakes Higher
Spray foam is more sensitive to its environment than any other common insulation product. Fiberglass batts perform about the same at 60°F and 100°F. Spray foam doesn’t. It needs a specific temperature window during application, and Enterprise’s desert climate routinely pushes outside it. An attic in July can hit 140°F. An overnight job in January can drop below 40°F. Both of those conditions push foam outside the manufacturer’s stated application window, and both of them are exactly the reason a homeowner with a consumer kit can’t get a good result on their own.
On the flip side, once it’s correctly applied, spray foam is an excellent fit for this climate. It seals the attic from the desert heat and reduces the temperature swing the HVAC system has to fight. We’ve seen attics in Enterprise that regain 15 to 25 percent of their cooling efficiency after a proper spray foam job, because the foam closes gaps that fiberglass batts simply can’t. The catch is that getting that result requires proper application, and proper application in Enterprise often means an early-morning start, controlled ventilation, and a technician who knows what the foam should look like when it’s curing in 105°F heat.
The material brand matters here too. We source from eight manufacturers, including Icynene, Demilec, Rockwool, and CertainTeed, and match the product to the specific insulation need rather than pulling whatever’s in stock. Closed-cell foam and open-cell foam solve different problems, and a one-size-fits-all approach is how attic projects go sideways. For a broader overview of our services, visit Aspen Attic Insulation Enterprise home.
Common Mistakes to Avoid
Here are the mistakes we see most often when homeowners take on spray foam themselves, or choose the wrong contractor:
- Spraying a large area with a consumer kit. Consumer kits are for targeted air sealing. Covering a whole attic floor with a stack of consumer cans will leave you with uneven coverage, inconsistent thickness, and an R-value you can’t predict.
- Spraying foam onto a wet substrate. After rain or a leak, attic wood can stay damp for days. Foam applied to damp wood traps that moisture and starts to fail from the inside out.
- Ignoring the temperature window. In Enterprise, this is the number-one reason consumer foam jobs fail. Spraying in a 130°F attic, or overnight in January, is a recipe for an off-ratio cure.
- Skipping the respirator. “Ventilate the space” doesn’t cut it. The isocyanate A-side of the foam is a respiratory sensitizer, and one bad exposure can change how your lungs react for years.
- Not letting the foam cure fully before trimming. Trimming too soon leaves you with a foam surface that looks dry but isn’t, and traps solvent vapors inside.
- Hiring the low bid without asking the four calibration questions. A cheap quote often means skipped calibration, skipped temperature monitoring, or skipped thickness verification. The savings often show up six months later as a remediation bill.
- Assuming all foam is the same. Open-cell and closed-cell spray foam behave differently in this climate, serve different purposes, and cost different amounts. Match the product to the job, not the job to the product.
When to Call a Professional
Call a professional anytime the foam job involves more than a handful of individual penetrations, any part of the roofline or attic floor, or any application in an attic where the ambient temperature will be outside 60-85°F. Call if you’re dealing with a failing foam job from a previous contractor, either from a bad cure or from moisture intrusion. Call if you’ve noticed your HVAC bill creeping up and you suspect your current insulation isn’t doing its job. Aspen Attic Insulation Enterprise offers free estimates in Enterprise, and we’ll send you the technician’s name and photo before anyone knocks on your door. Call (844) 761-9996 and we’ll talk through the job, give you a written price before any work begins, and back it with the 365-Day Done Right Promise in writing.
Frequently Asked Questions
You can install small, targeted air sealing with a consumer foam kit, typically around pipes, wiring, and gaps in window and door frames. You cannot reliably apply whole-attic spray foam yourself, because you can’t control the ratio, temperature, and thickness variables that determine whether the foam cures properly. For anything bigger than targeted air sealing, hire a qualified applicator.
It’s cheaper up front and often more expensive over time. Consumer kits run $30-$60 per can, and a typical attic job requires many cans. That’s before you factor in the cost of a failed cure, which can run $2,000-$6,000 to remove and reapply. In Enterprise, professional spray foam runs $1.50-$4.50 per square foot for closed-cell, and $0.75-$2.50 for open-cell. Call (844) 761-9996 for an exact quote based on your attic.
Closed-cell foam is denser, provides a higher R-value per inch, and acts as a vapor barrier. Open-cell foam is lighter, more flexible, and better for sound dampening but provides less R-value per inch. In Enterprise’s hot climate, closed-cell is often the better choice for the roofline and rim joists, while open-cell works for interior sound insulation or where vapor permeability matters. A qualified applicator can tell you which is right for your specific attic.
Look for discoloration, a tacky surface 24 hours after application, shrinkage, visible voids, or a crumbly texture. Any of those are signs of an off-ratio cure, which means the foam’s R-value has dropped and it’s no longer doing its job. Call (844) 761-9996 if you’re not sure what you’re looking at; a remediation estimate is free.
A typical attic spray foam job takes one to two days, depending on square footage, foam type, and whether any prep work is needed. The foam itself cures quickly, but the space needs to be vacated during application and ventilated for a few hours afterward. We give you a written schedule and price before any work starts, so there are no post-job surprises.
Ask four questions: how they check equipment calibration, how they monitor temperature, how they verify foam thickness, and what happens if the foam fails to cure. Qualified applicators have clear answers to all four. Also ask whether the contractor sends the technician’s name and photo before the visit, and whether they offer a written guarantee covering labor and materials. At Aspen Attic Insulation Enterprise, we do all of that on every job.
The Bottom Line
Consumer foam kits have a real, legitimate place in home maintenance, but that place is small: sealing penetrations around pipes, wiring, and small gaps. Whole-attic spray foam is a different product entirely, applied with different equipment, and governed by ratio, temperature, humidity, and thickness variables that consumer kits cannot control. In Enterprise’s desert climate, those variables matter more than anywhere else. If you’re considering spray foam for your attic, hire a qualified applicator, ask the four calibration questions, and get a written price before work begins. That’s how you avoid a remediation bill six months from now.
Ready to talk about your attic? Aspen Attic Insulation Enterprise offers free estimates in Enterprise. Call (844) 761-9996. We answer 24/7 with a live person, we send the technician’s name and photo before the visit, and we back every job with the 365-Day Done Right Promise in writing. If you want a broader look at how the materials compare, our guide to spray foam insulation in Enterprise walks through the product types in more detail.
Written by the team at Aspen Attic Insulation Enterprise.