
Last updated November 18, 2026
DIY vs Professional Insulation: The Enterprise Homeowner’s Decision Guide
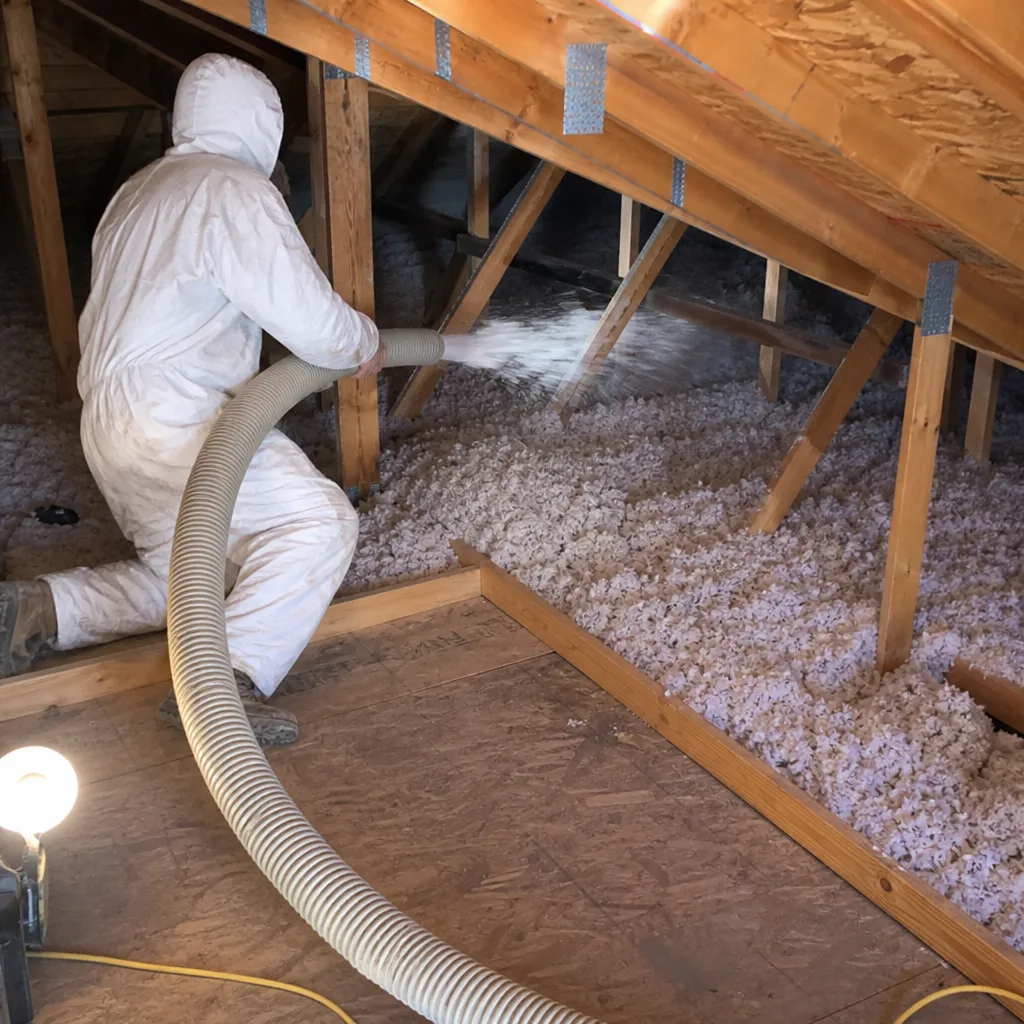
Here’s the project that trips up more Enterprise homeowners than any other: adding blown-in insulation right on top of the old batts in the attic. It looks like the easiest job in the house. Rent the machine, buy the bags, climb the ladder, fill the cavity. The problem is that the prep work which actually makes that installation perform isn’t printed on any rental sheet at the box store, and skipping it usually leaves you with a thinner total R-value than you started with. This guide draws a hard line between the insulation tasks that are genuinely homeowner-appropriate and the ones that quietly cost you money or safety in Enterprise’s climate. You’ll leave knowing what you can do yourself, what you shouldn’t touch, and what either path actually costs.
Quick Answer
Do the small stuff yourself: weatherstripping, insulating the attic hatch, replacing a torn batt in an open, easy-to-reach spot. Hire a professional for anything involving blown-in installation near HVAC equipment, air sealing around recessed lights, or disturbing old loose-fill material, because those tasks carry moisture, fire, and health risk in Enterprise’s high-desert climate that a rental machine won’t warn you about. The material savings from a full DIY blown-in job are usually smaller than homeowners expect once equipment rental and wasted product are counted.
Table of Contents
- Where the line actually falls in Enterprise
- Tasks that are genuinely safe and cost-effective for a homeowner
- Tasks that look simple but carry real risk in Enterprise
- What a DIY blown-in job really costs vs. a professional quote
- The insurance and liability question nobody mentions
- How to stage a hybrid approach that actually works
- Common mistakes to avoid
- When to call a professional
Where the Line Actually Falls in Enterprise
The DIY versus professional question for insulation usually gets answered with a shrug and “it depends on your comfort level.” That’s not useful. A better split is by task risk, and the risk profile in Enterprise is specific. This is high-desert country on the southern edge of the Las Vegas Valley. Summer attic temperatures routinely climb past 150°F, winter nights swing cold, and the dry air means moisture behaves differently than it does in a humid climate. Insulation work here has to account for extreme heat gain and for the occasional monsoon-season humidity spike that can get trapped in a badly installed assembly.
We’ve watched homeowners in Enterprise succeed at several projects and fail at others, and the pattern is consistent. The successes share one trait: the task is contained, visible, and reversible. The failures share another: the task involves a complete thermal envelope, a combustion appliance, or a material whose history you can’t confirm by looking at it.
That gives you a simple test before you start any insulation project in your Enterprise home:
- Contained and visible? You can see the whole work area and undo it if it goes wrong. Usually fine to DIY.
- Hidden or systemic? The work touches ductwork, a furnace flue, recessed lighting, or an assembly you can only see half of. Leave it to a trained installer.
- Unknown material history? You don’t know what was installed before, or when. Stop and get it assessed before you disturb it.
That last one matters more in Enterprise than most people realize. A significant share of the valley’s housing went up in the 1990s and 2000s, but plenty of older homes in and around the Enterprise area still have original insulation that predates current code. If you don’t know what’s up there, don’t vacuum it into a rental machine and blow it around.
Tasks That Are Genuinely Safe and Cost-Effective for a Homeowner
Some insulation work is well suited to a careful homeowner with a few basic tools, and doing it yourself saves real money. These are the jobs we’d never talk you out of in Enterprise.
Weatherstripping doors and windows. This is the highest-return DIY task in the house. A $20 roll of foam or felt weatherstripping stops drafts that make your furnace and AC work harder than they need to. You’re not altering insulation performance; you’re closing a gap.
Insulating the attic hatch and pull-down stairs. The hatch is a thin, uninsulated rectangle that vents heat straight out of the house in winter and bakes the space in summer. Gluing a rigid foam board to the back of the hatch door and adding weatherstripping around the frame takes an afternoon and a modest amount of material.
Replacing a torn or fallen batt in an accessible area. If a single batt of fiberglass has sagged or torn away from the joist bay and the space around it is clear, swapping it is straightforward. Match the R-value of the surrounding insulation, don’t compress it, and keep it from covering anything you shouldn’t cover (more on that below).
Sealing obvious air leaks you can reach and see at the top plate of a wall or along an accessible seam, using caulk or spray foam rated for the application. This bridges into the next section, so read the caveats: air sealing is easy in open spots and genuinely risky near heat sources.
For a predictable, weathertight baseline in an Enterprise home, the accessible, low-risk upgrades are where a homeowner’s own labor pays off fastest. When you’re ready to add attic insulation in Enterprise at the level the desert climate actually calls for, though, that’s where the DIY math starts to shift.
Tasks That Look Simple but Carry Real Risk in Enterprise
This is the part of the guide that matters most. These projects sound like the ones above, but they carry failure modes a homeowner can’t see coming, and in Enterprise’s climate those failures show up fast.
Blowing insulation in around HVAC equipment. The furnace and air handler sit in the attic, and the temptation is to bury everything for maximum R-value. Don’t. A gas furnace needs a clear combustion air space and clearance to its flue; covering it can create a carbon monoxide hazard or void the unit’s warranty. Ductwork also has to stay accessible, and any gaps between ducts and the conditioned space need sealing first, or you’ll be insulating over a leak that dumps your cooled air into the attic all summer.
Air sealing around recessed lights. An older can light that isn’t rated IC (insulation contact) is a heat source, and packing insulation against it is a fire risk. Even IC-rated fixtures usually need a proper air-seal assembly to keep attic air and moisture out. This is not a spot for a caulk gun and good intentions.
Disturbing vermiculite or unidentified old loose-fill. Vermiculite insulation installed decades ago has been linked to asbestos, and you cannot tell by looking. In Enterprise, homes that predate the mid-1990s can have it, and it’s often buried under newer material. Blowing air through it, sweeping it, or vacuuming it up is exactly the wrong move. Stop and have it tested before anyone touches that attic.
The blown-in-over-batts mistake. Back to the opening hook. Adding loose-fill on top of existing batts without sealing air leaks and without making sure the old material isn’t compressed can leave you with a lower effective R-value than you paid for, because heat finds the leaks and the compressed batts do less work than their label claims. That’s a moisture and performance problem that won’t announce itself until a summer utility bill or a damp patch shows up.
What a DIY Blown-In Job Really Costs vs. a Professional Quote
Homeowners usually compare the price of materials to a professional quote and conclude DIY is a steal. The comparison misses equipment, waste, and time. Here’s a realistic picture for an Enterprise attic, using ballpark figures you should verify locally. Treat these as ranges for planning, not as a quote for your specific home.
- Insulation material (loose-fill fiberglass or cellulose): roughly $400 to $900 for a typical single-family attic, depending on target depth and the brand you buy (GreenFiber and Owens Corning are common retail options).
- Blower machine rental: many home centers offer a free rental with a minimum material purchase, but the free-with-purchase minimum can push you into buying more bags than you need. Count on $0 to $150, plus the cost of driving to return it.
- Air sealing materials (caulk, spray foam, baffles): $80 to $250, and this is the line item most DIYers skip entirely.
- Protective gear and time: respirator, goggles, coveralls, a helper, and a full weekend or more. Your labor is free only if your weekend is.
A professional installation in Enterprise typically runs in the range of $1,400 to $3,500 for a full attic job including air sealing, depending on square footage, target R-value, and what the existing assembly needs. That’s more than the DIY material bill, but it includes correct depth, sealed leaks, safe clearances around the furnace and flue, and a written price before any work starts. If your goal is simply a small top-off in an accessible area, DIY can win. If it’s a whole-attic upgrade, run the numbers honestly, and get at least one written quote to compare against. Our blown-in insulation in Enterprise service is a good place to see how we scope a full-attic job and why the prep matters as much as the material.
The Insurance and Liability Question Nobody Mentions
Here’s the part that doesn’t come up at the rental counter. If a fire or a moisture claim happens and an adjuster finds that unpermitted, improperly installed insulation contributed, the claim can get complicated. That’s not a scare tactic; it’s how adjusters think when they investigate an attic fire or a mold claim traced to a buried, overheated fixture or a blocked combustion vent.
The specific risk in Enterprise is not exotic. Recessed lights buried under new insulation, a furnace flue packed in material, or an unsealed assembly that traps monsoon-season moisture are all failure modes that can end up in an insurance file. A trained installer addresses clearance, air sealing, and venting as part of the job, and documents what was done. That documentation matters if you ever sell the home or file a claim.
None of this means you can’t touch your own insulation. It means the work that touches a heat source, a combustion appliance, or the thermal envelope as a whole should be done to a standard that survives an inspection. A written scope and a clear install record are worth more than the money you save being your own general contractor.
How to Stage a Hybrid Approach That Actually Works
You don’t have to pick a side. The best-value path for many Enterprise homeowners is a hybrid: do the prep yourself, hire a professional for the technical install, and verify the result afterward. Here’s the sequence.
- Do the accessible sealing and weatherstripping yourself. Doors, windows, the attic hatch, and obvious leaks at reachable seams. This is the low-risk category from earlier, and it lowers what the pro needs to do.
- Clear the attic and document what’s there. Photograph the existing insulation, the HVAC equipment, the flue, and any older loose-fill material. If you suspect vermiculite, do not disturb it. Note its location for the installer.
- Get a written quote that separates prep from install. A good quote itemizes air sealing, baffles, clearance work around the furnace and lights, and the new material. If a quote is just a dollar figure and a bag count, ask what’s missing. Our spray foam insulation in Enterprise page shows how we approach the trickier assemblies that need a sealed, air-tight transition rather than loose material.
- Hire the install for the technical work. Blown-in around HVAC equipment, sealing around recessed lights, and anything near unknown old materials go to a trained installer with proper equipment.
- Verify the depth yourself after the job. A ruler or marked stick in several spots across the attic tells you whether the installed depth matches the target R-value on the paperwork. Do it before you sign off.
This approach keeps your own labor where it pays and puts the money toward the parts that carry risk. For the full picture of how the different insulation types stack up for a home, start with our Aspen Attic Insulation Enterprise home page to see the services we cover.
Common Mistakes to Avoid
- Blowing loose-fill over existing batts without sealing first. Heat finds the leaks, and you end up paying for insulation that underperforms its label. Prep comes before material, every time in Enterprise’s climate.
- Burying recessed lights and furnace equipment. Non-IC lights and gas furnaces need clearance. Packing insulation against them is a fire or carbon monoxide risk that a quick glance won’t reveal.
- Disturbing unknown old insulation. If the material predates the 1990s or you can’t identify it, stop. Vermiculite and old loose-fill can carry asbestos or other hazards.
- Compressing batts to “make them fit.” Squeezing fiberglass lowers its R-value, and in a hot desert attic that shortfall shows up on your summer bill.
- Covering ducts without sealing them first. Insulating over a leaky duct just buries the leak. Seal the joints, then insulate.
- Buying more material than you need because of the free-rental minimum. A free blower with a purchase minimum can push you into leftover bags that sit in the garage.
- Working a summer attic without a break plan. Enterprise attic temperatures can climb well past 150°F. Heat illness is a real risk; work early, hydrate, and use a respirator.
When to Call a Professional
Call a professional in Enterprise when the job touches any of these: a gas furnace or flue, recessed lighting that isn’t confirmed IC-rated, ductwork you’d have to insulate over, older or unidentified insulation, a whole-attic upgrade, or any sign of moisture in the assembly. Those aren’t skill-level questions; they’re safety and liability questions, and getting them wrong is expensive in ways a utility bill won’t show. If you’re standing in an attic this weekend deciding whether to rent a blower, this is the moment to get a second set of eyes on the plan. Aspen Attic Insulation Enterprise offers free estimates in Enterprise, with a written price before any work begins and our 365-Day Done Right Promise behind every job. Call (844) 761-9996 to get a written quote and compare it against your DIY plan.
Frequently Asked Questions
You can, but only after air sealing and only if the existing batts aren’t compressed or moisture-damaged, which is why it’s the DIY job most likely to underperform. Blowing new material over unsealed leaks and deteriorated batts can leave you with less effective R-value than you planned. Call (844) 761-9996 for a free estimate if you’re unsure what’s up there.
Burying or improperly sealing around attic HVAC equipment, and disturbing old insulation that may contain vermiculite. The high-desert heat makes attic conditions extreme, so clearance and air sealing mistakes around the furnace and flue are where problems start. A written, itemized quote should show both in the scope.
DIY is cheaper only for small, accessible jobs like weatherstripping and hatch insulation; for a full-attic blown-in upgrade, the gap narrows once equipment, waste, and time are counted. Professional full-attic jobs in Enterprise typically run $1,400 to $3,500 depending on size and target R-value. Call (844) 761-9996 for an exact quote. Estimates are free.
It can if a claim traces back to improper installation, such as a buried non-IC light or a blocked furnace vent. Improper work that contributes to a fire or moisture claim can complicate the adjuster’s review. A professional install with a written scope and clear documentation is the safer record to have.
Measure the installed depth in several spots across the attic and compare it to the target R-value on your paperwork. Check that the furnace, flue, and recessed lights still have their required clearances, and confirm any ducts were sealed before being covered. Do this before you sign off.
You handle the weatherstripping, hatch insulation, and accessible sealing, and a professional handles the technical blown-in install, clearance work, and air sealing around heat sources. Then you verify depth afterward. It keeps your labor where it pays and puts the money toward the parts that carry risk. Call (844) 761-9996 to scope the professional half.
The Bottom Line
The DIY versus professional insulation question isn’t about how handy you are. It’s about which tasks carry hidden risk in Enterprise’s climate and which are genuinely yours to take on. Weatherstripping, hatch insulation, and a single accessible batt are safe and worth your weekend. Blown-in installation around HVAC equipment, air sealing near recessed lights, and any work near old or unidentified material belong with a trained installer who builds clearance and documentation into the job. Run the real numbers before you rent a machine, keep a written scope in hand, and verify the result yourself. That’s how you get insulation that performs in the desert rather than underperforming because of a missing prep step.
Aspen Attic Insulation Enterprise gives you a written price before any work starts, technicians who arrive in marked uniforms with photo ID badges and a name and photo sent ahead of the visit, and a 365-Day Done Right Promise covering labor and materials, backed in writing. Our technicians have up to 24 years of experience, and we work with materials from Owens Corning, Johns Manville, GreenFiber, and Demilec among others, matched to the specific need rather than a one-size-fits-all product. A live person answers the phone 24/7. Call (844) 761-9996 for a free estimate and get the decision off your plate.
Written by the team at Aspen Attic Insulation Enterprise.