
Last updated November 18, 2026
DIY vs Professional Attic Insulation: What’s Safe to Do Yourself
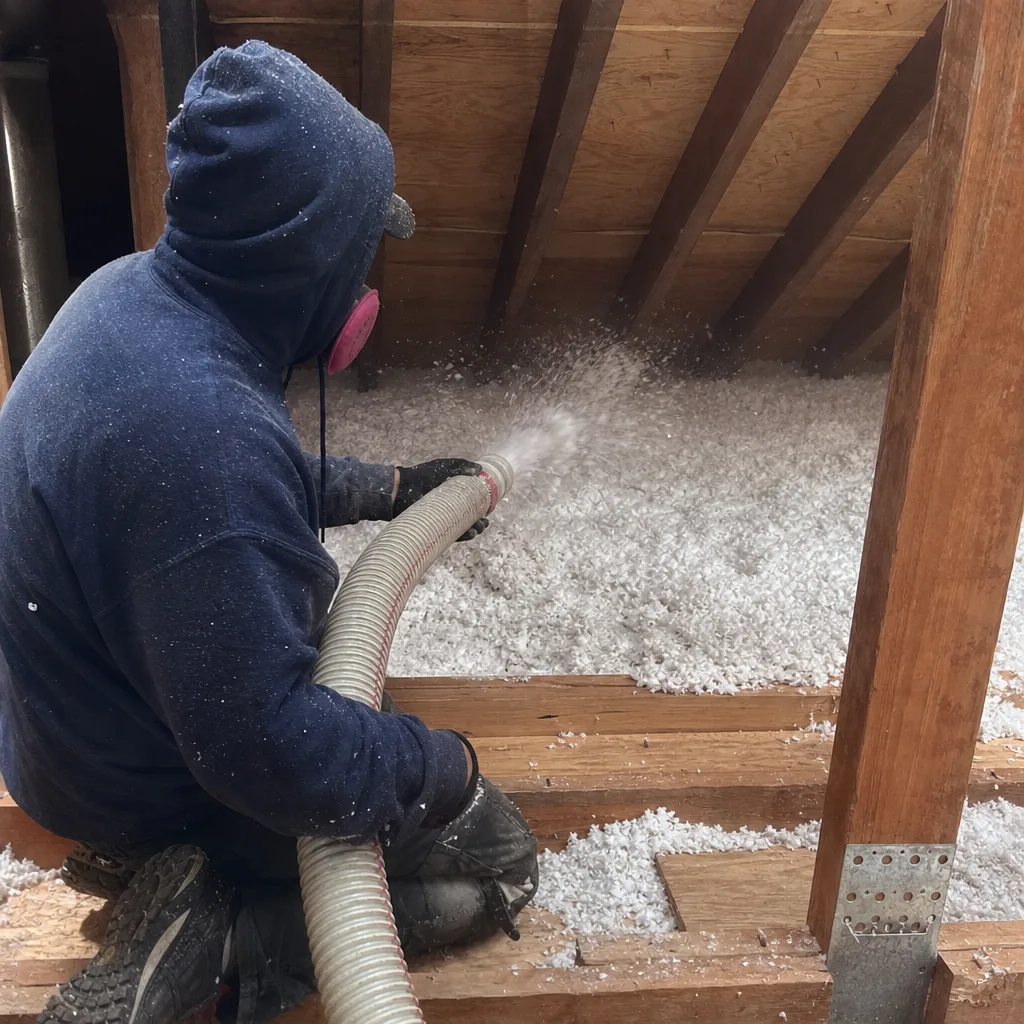
Home improvement stores rent blown-in machines for free when you buy enough bags of insulation, and that’s genuinely useful for exactly one scenario: a clean attic with sound existing fiberglass, no wiring hazards, and nothing weird hiding under the surface. The problem is that three other scenarios look identical from the attic hatch, and two of them can put your family’s health or your homeowner’s policy at real risk. We’re going to draw the line clearly, because most guides blur it. In this guide you’ll learn what’s genuinely safe to do yourself, what isn’t, how to check your own attic before you decide, and what to ask a professional before they close up the hatch. If you’re in Enterprise and your attic dates to before the mid-1990s, read the section on vermiculite carefully before you touch anything.
Quick Answer
Blown-in fiberglass over clean existing fiberglass is a reasonable DIY project if your attic has no knob-and-tube wiring, no vermiculite or asbestos-containing materials, no HVAC equipment or ductwork in the space, and clear soffit vents along the roofline. Everything else – old attic insulation of unknown origin, air-sealing around recessed lights and top plates, spray foam, and any insulation removal work – belongs to a professional. The safety and liability gap between those two buckets is wide, and it’s determined by what’s in your attic, not by your skill level.
Table of Contents
- What makes a blown-in attic insulation project safe to DIY?
- Why air-sealing has to come before insulation (and why it’s rarely a DIY job)
- What’s actually in your attic: vermiculite, knob-and-tube wiring, and asbestos risk
- What the “free machine rental” doesn’t cover
- How to inspect your Enterprise attic before you decide
- What professional attic insulation in Enterprise actually includes
- The one question that separates a thorough installer from a fast one
- DIY vs professional attic insulation: which way makes sense for you
What makes a blown-in attic insulation project safe to DIY?
For DIY to make sense, your attic has to check every box below. Miss one and the answer changes. We’ll walk through the specific failures we see most often, but here’s the checklist first.
- The existing insulation is fiberglass – batt, blown, or a blend. You can identify it by the pink, yellow, or white color and the glassy, fibrous texture. If you can’t identify it, don’t proceed.
- There’s no knob-and-tube wiring visible – those are the white ceramic knobs with cloth-wrapped wires running across the joists. Standard practice is to have them evaluated by an electrician before any insulation touches them.
- Nothing in the attic has asbestos – no vermiculite, no degraded duct wrap, no damaged old pipe insulation. More on vermiculite in a minute.
- No HVAC equipment or ductwork in the attic – if the air handler or the supply plenum lives up there, the insulation work has to integrate with the duct system, which changes the job.
- Soffit vents are clear along the roofline – the ridge-to-soffit ventilation path has to stay open or you trap moisture against the roof sheathing. Baffles are required over every vent bay, not just some.
- You can get two people up there safely – a blown-in job takes a loader at the machine and a person in the attic running the hose. One person cannot do it.
- You’ve got a respirator-grade mask and eye protection – not a dust mask. A fitted N95 or half-face respirator with P100 cartridges, plus goggles that seal against the face.
If everything above is true, DIY blown-in is a legitimate weekend project. But in a lot of Enterprise homes, particularly anything built before the mid-1990s or anything that’s had electrical work done without permits over the years, at least one of those boxes fails. That’s where the conversation shifts, and we’d rather tell you that up front than after you’ve spent a Saturday on it.
Why air-sealing has to come before insulation (and why it’s rarely a DIY job)
Here’s the truth most product packaging skips: insulation slows heat transfer, it doesn’t stop air movement. If warm air is leaking out of your living room through the top plates of your walls, around recessed light housings, or through the gaps where plumbing penetrates the ceiling, that air just goes right through the insulation and out the roof. You’ve paid for insulation and gotten a slightly warmer draft. Air-sealing the attic floor with foam and caulk is the step that turns insulation into an actual thermal boundary, and it has to happen before the new insulation goes in, because once the attic floor is covered with six inches of blown fiberglass, you can’t find the leaks anymore without digging back through it.
The problem is that air-sealing isn’t one product – it’s a specific sequence of work that includes:
- Foam-sealing top plates and sole plates where wall framing meets the ceiling framing, which is where the most air leaks live.
- Sealing all electrical penetrations – every wire, every switch box, every can light – with fire-rated materials appropriate for the housing.
- Building boxes or covers around recessed lights and bath fans so that insulation doesn’t come into direct contact with heat-producing fixtures. Standard cans need a specific air-sealed cover; “IC-rated” cans still need foam gasketing at the trim, and the fan housings need careful attention.
- Sealing the attic hatch itself – most attic hatches leak as much air as a small window.
- Chimney and flue clearances to keep combustible materials at the correct distance from heat sources and to allow the smoke path to remain intact.
- Baffle installation at every soffit vent to keep the ventilation channel open after the blown-in insulation goes down.
Each of those steps is small. Doing all of them on a production residential attic typically takes a trained crew several hours with the right foams, gaskets, baffle stock, and lighting. It’s not that a homeowner can’t learn it – it’s that most homeowners, once they see the actual list of what needs sealing, decide the value of the job is in getting it right the first time. That’s the judgment call we make on every estimate in Enterprise.
What’s actually in your attic: vermiculite, knob-and-tube wiring, and asbestos risk
This is the section that matters most, and it’s the one most DIY guides gloss over. Pre-1990 homes in southern Nevada are a specific risk profile, and the attic is where two of the biggest legacy hazards live.
Vermiculite insulation
Vermiculite is a pebble-textured, grayish-brown or gold-brown loose-fill material that was common in attics built or insulated before the early 1990s. It looks a little like gravel or kitty litter, sometimes with a slight metallic sheen. Some vermiculite sold in the U.S. under the Zonolite brand name has been shown to contain asbestos fibers, and the legal exposure of disturbing it without proper handling is real: your homeowner’s policy may not cover asbestos-related claims from unpermitted homeowner work, and the abatement cost of cleaning up a contaminated attic can run into the tens of thousands of dollars. If you think you see vermiculite, stop. Don’t blow anything over it. Don’t vacuum it. Have it sampled by a certified inspector. Any professional insulation contractor worth hiring will not proceed on an attic with unknown vermiculite until it’s been cleared.
Knob-and-tube wiring
Knob-and-tube is the pre-1950s wiring style: white ceramic insulators (knobs) stapled to the joists, with cloth- or rubber-wrapped conductors running between them. The insulation on that old wire becomes brittle over decades of Desert Southwest attic heat, and modern fiberglass blown over it can hide a developing fault. Worse, some insurers will not bind a homeowner’s policy over an attic containing known knob-and-tube, and if a fire later traces to it, coverage disputes can get ugly. Any knob-and-tube must be evaluated by a licensed electrician before insulation is added. That’s a hard line, not a preference.
Other buried hazards
Other things we routinely find under old attic insulation in Enterprise homes: degraded duct wrap (sometimes asbestos-containing on pre-1980 ductwork), abandoned bath fans venting into the attic instead of outdoors, water-damaged sheathing from a prior roof leak, and rodent contamination that requires sanitizing before new material goes down. Each of those changes the scope and the price.
What the “free machine rental” doesn’t cover
The blown-in machine rental looks like a free win on the surface – you buy twenty or thirty bags of insulation and the machine comes with it. Here’s what’s actually not included in that deal:
- PPE – a fitted respirator with P100 cartridges, sealed goggles, coveralls, gloves, knee pads, and a headlamp. Buying a decent setup runs $80-$150 and you’ll want the respirator to be new, not borrowed.
- The second person – one person feeds the machine (breaks up clumps, loads bags, monitors the hopper) while the other runs the hose in the attic and meters depth. A single person trying to do both will spend more time climbing down to check the machine than actually installing insulation.
- Disposal of old material – if your attic has old compromised insulation that should come out before new goes in (rodent damage, water damage, vermiculite), removal is a real job. Bagging and disposing of a 1,000-square-foot attic’s worth of old blown-in can run several hundred dollars in bags, dumpster rental, and labor alone.
- Baffles, foam, and air-sealing materials – another $150-$400 in materials the rental machine doesn’t include and can’t install for you.
- Follow-up – if the depth comes out uneven (common when homeowners guess at the coverage chart), or if a baffle shifts and blocks a soffit vent, or if the hatch cover doesn’t seal, there’s no one to call. The savings evaporate when the first cold snap reveals the hot room is still hot.
The machine rental is a fine deal for the one scenario it’s designed for. It’s a bad deal when it turns into a hidden cost and a failed job.
How to inspect your Enterprise attic before you decide
You can do this yourself in about twenty minutes with a headlamp and a notepad, and it will tell you whether the answer is “go for it” or “call someone.” In our experience, the summer heat in Enterprise – where attic temperatures climb past 130°F on a July afternoon – makes this a morning job, and worth doing slowly. Here’s the sequence:
- Look before you crawl in. From the hatch, with the light on, scan left to right for anything that’s a different color or texture than the rest of the insulation. Note mismatched areas – they usually mean a prior repair, a pest issue, or a mix of materials.
- Check for knob-and-tube first. Any white ceramic knobs with cloth-wrapped wires running parallel to the joists means the job pauses until an electrician signs off.
- Note the insulation material and depth. A cheap ruler stuck straight down into the insulation gives you depth in inches. The U.S. Department of Energy recommends R-49 to R-60 for our climate zone, which works out to roughly 14 to 18 inches of fiberglass in most setups. If you’re under 10, you’re a strong candidate for more insulation – but the “how” still depends on the “what.”
- Look for vermiculite. If the material anywhere in the attic has that pebbly, gravel-like texture and light-brown sheen, stop planning and schedule a sample test before anything else.
- Look for water stains and pest evidence. Brown rings on the roof sheathing, dark streaks on the joists, or droppings under the insulation. Those need to be addressed before new material goes down, not after.
- Find the soffit vents. From inside the attic, look along the eaves for daylight coming through the vent slots. If you can see it, note whether each bay has a baffle already installed. If you can’t see light, ventilation may be blocked.
- Check for HVAC equipment. If the furnace or air handler is in the attic, or if ductwork is running through it, the job is more complex than a simple blow-in.
- Take a photo of the hatch. The attic hatch weatherstripping and cover condition often tells you what kind of job you’re walking into.
If you walk out of that inspection with a clean list and no unknowns, the DIY path is defensible. If anything on the list is a question mark, that’s your answer.
What professional attic insulation in Enterprise actually includes
When we quote a job, we’re not itemizing “insulation” – we’re quoting the whole thermal envelope. Our attic insulation in Enterprise service includes the inspection, air-sealing work, baffle installation, and the new material, all quoted in a written price before anyone climbs into the attic. That matters because homeowners should know the number before the hose goes in, not after. The materials we work with include Owens Corning fiberglass, GreenFiber cellulose, Johns Manville, and Demilec spray foam, and the choice between them is driven by what the attic actually needs – not by what’s sitting on a shelf.
For homeowners who want to compare specific product paths, our blown in insulation in Enterprise page covers the loose-fill options in detail, and our spray foam insulation in Enterprise page covers the closed-cell and open-cell applications that make more sense when air-sealing is the priority or when ductwork and HVAC equipment live in the attic.
Two things about how the work happens. First, the technician who shows up at your door is background-checked, identity-verified, in a marked uniform, with a photo ID badge, and we send you their name and photo before the visit. If anyone else arrives, the visit is free and we make it right. Second, every job carries a 365-Day Done Right Promise, backed in writing, covering labor and materials – if the work fails, we make it right, with a free second visit. That’s the part of “professional” that doesn’t show up in the price comparison, and it’s why the number on the quote isn’t the only number that matters.
What happens when you call
- 1
A real person answersNo phone trees – you reach a local pro.
- 2
You get an upfront price rangeHonest numbers before anyone is dispatched.
- 3
A background-checked tech heads outLicensed & insured, dispatched right away.
- 4
You approve before work beginsNothing starts until you say go.
The one question that separates a thorough installer from a fast one
Here’s the question: “How many penetrations did you air-seal, and can you show me the photos?”
A thorough installer will answer that with a number – the number of top plate penetrations, wire holes, recessed lights, and duct boots sealed – and with photos taken before the new insulation went down. A fast installer will say something like “we seal everything, don’t worry.”
The reason this question works is simple: air-sealing is the step that requires the most time and the most judgment, and it’s the step that’s invisible once the job is done. Any insulation contractor who won’t or can’t show the sealed penetrations before they close up the job is either not doing it or not documenting it. Both are problems. The right material in an unsealed ceiling is a job half done – and the homeowner is paying full price for it.
The photo documentation should arrive with the invoice, along with the written price you already have. If you’re in Enterprise and the answer is “we don’t have photos,” that’s a fair conversation to have before signing the paperwork. Call (844) 761-9996 if you want to see ours.
DIY vs professional attic insulation: which way makes sense for you
The comparison comes down to three trade-offs, and they should be weighed differently depending on your attic.
- Time: A DIY blown-in job on a 1,200-square-foot attic is realistically a two-person, full Saturday project – plus shopping, PPE, and follow-up. A professional crew typically does a comparable attic in half a day or less, including air-sealing.
- Cost: Materials for a DIY job typically run $600-$1,200 in an average Enterprise attic – insulation, baffles, foam, caulk, PPE. A professional installation covering the same square footage, with air-sealing, is generally $1,600-$3,200. The gap is real, but it also covers removal of old material, air-sealing, the follow-up visit, and the written guarantee.
- Risk: Material defects, missed air-sealing, blocked soffit vents, and hidden hazards (vermiculite, knob-and-tube, water damage) don’t show up until the next season. When they do, DIY has no recourse and professional does.
If your attic checks every box in the earlier section, the DIY math works and we’ll say so. If it doesn’t, the long-run cost of a failed DIY job lands close to the professional price – sometimes above it – with a Saturday gone and a warmer room still waiting for a fix. For a fully credentialed look at the whole picture, our Aspen Attic Insulation Enterprise home page covers the full scope of what we do.
Common Mistakes to Avoid
- Assuming free machine rental covers the whole job. It covers the machine and the bags. It does not cover PPE, the second person, disposal, baffles, foam, or follow-up.
- Blowing new insulation over vermiculite. Pre-1990 Enterprise homes – and this includes a lot of the housing stock around older sections of town – sometimes have vermiculite under the fiberglass. Covering it traps the hazard rather than resolving it, and it makes abatement more expensive later.
- Adding insulation without air-sealing first. This is the most common mistake we see, and it’s why some homeowners report that “the new insulation didn’t help.” The heat is still escaping through the top plates.
- Blocking the soffit vents. Without baffles at every vent bay, the blown-in will cover the intake air path, and the attic will overheat in Desert Southwest summer conditions and pull moisture in winter. Ridge vents can’t do the ventilation job alone.
- Blowing insulation over IC-rated recessed lights without gasketing. IC-rated cans are designed for contact, but the trim ring is still a major air leak, and non-IC cans in older homes need a specific cover or serious clearance. A fast install misses this.
- Using a paper dust mask instead of a respirator. Fiberglass particles are a respiratory irritant, and that attic dust includes decades of accumulated drywall and pest material. A sealed respirator with P100 cartridges is $30 – use it.
- Skipping photos of the sealed penetrations. Whether you hire us or anyone else, ask for photos of the air-sealing before the new insulation covers the work. Without them, nobody knows whether it happened.
When to Call a Professional
Call a professional if any of the following is true: your attic has vermiculite, knob-and-tube wiring, water damage, or pest contamination; your HVAC equipment or ductwork runs through the attic; you need air-sealing around recessed lights, top plates, or the attic hatch done correctly; or you simply don’t want to spend two Saturdays in a 130°F attic in July. Every one of those scenarios shifts the answer from “reasonable weekend project” to “specialist job,” and the cost of getting it wrong is higher than the premium for getting it right. Aspen Attic Insulation Enterprise offers free estimates in Enterprise – our technicians write the price down before the work starts, and every job is backed by a 365-Day Done Right Promise and a free second visit if it’s needed. Call (844) 761-9996 and a live person will pick up. No voicemail, no call-back window.
Frequently Asked Questions
Yes, in one specific scenario: clean existing fiberglass, no knob-and-tube wiring, no vermiculite, no HVAC equipment in the attic, and clear soffit vents with baffles already in place. If any of those conditions fail, the project isn’t a safe DIY job and belongs to a professional. Call (844) 761-9996 for a free estimate if you’re unsure which category your attic falls into.
No. Vermiculite insulation, particularly the Zonolite brand common before the early 1990s, may contain asbestos fibers, and covering it with new insulation traps the hazard instead of addressing it. It has to be sampled by a certified inspector before any further work. Any reputable insulation contractor will pause the job until that’s done. Call (844) 761-9996 to schedule an inspection if you’re seeing pebble-textured material in your attic.
Because insulation slows heat flow but doesn’t stop air leaks, and once the new insulation is down you can’t find the air leaks anymore. Sealing the top plates, wire penetrations, recessed light trims, and attic hatch turns the insulation into an actual thermal boundary. Skipping it is why some homeowners see no bill improvement after a DIY installation. Call (844) 761-9996 for a free estimate that includes the air-sealing scope.
Typically $1,600-$3,200 for an average Enterprise attic, depending on square footage, existing insulation condition, air-sealing scope, and whether old material needs removal. DIY materials for the same attic usually run $600-$1,200 before PPE, baffles, and disposal. The gap is real but so is the difference in follow-up. Call (844) 761-9996 for a written price before any work starts – our estimates are free.
No. Knob-and-tube wiring has to be evaluated by a licensed electrician first, and in many cases the safest path is removal or replacement before insulation work. Insulation can hide a developing fault in 80-year-old wire insulation, and some homeowner policies have coverage exclusions for claims involving known knob-and-tube. Call (844) 761-9996 if you’re unsure what the wiring in your attic is.
“How many penetrations did you air-seal, and can you show me the photos?” A thorough installer will answer with a number and documentation. A fast installer will wave it off. The photos should arrive with the invoice, along with the written price you agreed to. Our jobs include air-sealing documentation and the 365-Day Done Right Promise, which is worth seeing in writing. Call (844) 761-9996 with any questions.
The Bottom Line
The DIY attic insulation question isn’t about how handy you are. It’s about what’s already in your attic. If the existing insulation is fiberglass, the wiring is modern, the vents are clear, and there’s no vermiculite or HVAC equipment in the space, blown-in is a legitimate weekend project and the machine rental is a fine deal. If any of those fail, the job moves into specialist territory, and the DIY savings don’t hold up against the risk. Any time vermiculite, knob-and-tube, or a major air-sealing scope is on the table in Enterprise, call a professional. Every job we do is written down at one price before the work starts and backed for 365 days. Call (844) 761-9996 for a free estimate.
Written by the team at Aspen Attic Insulation Enterprise.